castaway stamppad

hier sind zwei karten, auf denen ich mit dem castaway stempelkissen experimentiert habe. für beide hintergründe weißen karteikarton eingefärbt mit vivid dyeinks (verdünnte refills), nach dem trocknen katzenmotive (rbbb) gestempelt mit sattem castaway-kissen, nach trocknen des abdrucks auf stufe 3 gebügelt.

(click to enlarge)

cat imprints on the background (stamps: rbbb) made with a castaway stamppad. white cardstock dyed with vivid inks (thinned refills), after drying stamped with castaway, let dry, ironed on high temperature.

tyvek

the second technique i learned last weekend is “bubbling” tyvek. antje and edix (both have no blog) had visited renate, owner of the stempelmine, and there they learned this:
die zweite technik, die ich am samstag gelernt habe, ist das “blasenbügeln” mit tyvek. antje und exid (leider beide ohne blog) hatten renate von der stempelmine besucht und dort folgendes gelernt: (auf deutsch ist die beschreibung übrigens auf renates website, deswegen spar ich mir das hier:)

you take a sheet of tyvek (sort of “plasticpaper”, some envelopes are made of this, or laboratory overalls; thin and tearproof).
paint both sides with acrylics (same or different colors, as you like) and let dry. i painted mine with black and turquoise (the black color run a bit through to the backside, as i painted it quite wet, but i like the results).

work outside because of the vapors – they might damage your health!

then take 2 sheets of parchment paper (to protect as well the tyvek as your iron).
cut your tyvek into small pieces (i tried out about atc-size, of course you can make any shape and size, but keep in mind it will shrink to smaller than half size!). take a piece and place it between the two baking papers. now move your iron over the tyvek (more floating slightly over the parchment, no pressing!) and you will see it shrink. the bubbles will be on the downside (away from the iron). they will turn out different every time – and that´s the fun part: you will never be able to predict what you will get!
i ironed some pieces with black side down, some the other way.
you can cut them afterwards also, but then i think the organic look is gone. but as you like…

on the upper pic you can see the black sides: if you like you can highlight the bubbles (or the “webbing” structures on the opposite side) with metallic rub ons…
on the pic below you see the turquoise sides – there i did not apply additional rubbings, as i liked the colors this way.

now you can glue (or sew) on a piece as part of an atc or card. or think of thousand different possibilities…
—————-
not shown here, but you can go on and treat the bubbles with a soldering stick and melt away the middle part of some bubbles to create holes. looks great also, esp. if the edges are highlighted with rub ons.

thou shalt not transfer! / es soll wohl nicht sein…

at our summer meeting on saturday we had a guest from berlin, angela sturm, who recently surprised me showing some wonderful transfers onto old postcards. they look so beautiful and perfect! and needed no gel – which seems not to be my thing (concerning transfers)…
she showed me how to do and i thought now i´ve found my way. it really looked easy-peasy!
an unserem sommertreff am samstag war angela aus berlin zu gast, und ich hatte kürzlich auf ihrem blog superschöne transfers gesehen, die sie auf alten postkarten gemacht hatte – und zwar ohne gel, mit dem ich ja irgendwie auf kriegsfuß stehe, zumindest was transfers betrifft… sie hat mir gezeigt, wie es geht und ich dachte, ich hätte jetzt endlich meine transfermöglichkeit gefunden. es sah echt kinderleicht aus!
——-

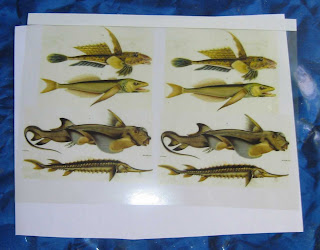
first you print your pics onto a inkjet transparency sheet.
als erstes druckt man sich bilder auf ein blatt inkjet-folie.

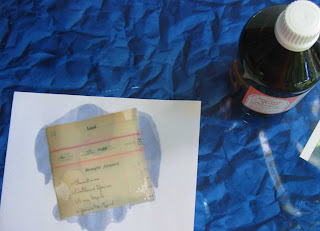
then you wetten a piece of paper with isopropylalcohol (70%) – take care, highly inflammable, so close the bottle immediately not to overthrow it!
dann gibt man 70%igen isopropylalkohol auf das blatt, wo der transfer hin soll – vorsicht, leicht entflammbar, also flasche gleich wieder verschließen, damit nix umfällt!


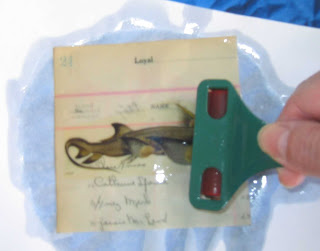
onto this wet surface you put your printed transparency. roll with a brayer or take a bonefolder to rub.
auf diesen nassen untergrund legt man nun das bedruckte folienstück. mit brayer drüber rollen oder mit falzbein andrücken.


now angela waited about 15 / 20 seconds and then lifted up the transparency – the pic had transfered perfectly onto the paper, the transparency was clean.
— well, different with me… i made 4 efforts and always, always(!) there was a thin coat over the pic that moved up with when i lifted the transparency. so the pic won´t lay down!!! (if you can imagine this…) i became impatient (i easily become impatient) and after the 4th try i just thought i should spend my life without transfers and concentrate on other things… arghhh!!!
nun hat angela ca. 15-20 sekunden gewartet und dann die folie hoch gehoben. das bild war perfekt transferiert, die folie leer. — tja, nicht so bei mir… ich hab 4 versuche gemacht und jedesmal war da ein dünner film über dem bild, der sich zwar von der folie gelöst hat (mühsam), aber der das bild (ganz oder teilweise) in der schwebe hielt, es wollte also nicht am papier kleben bleiben… so dass das bild falten schmiss, wenn ich es runter drückte, jedenfalls von perfektem transfer war ich wieder weit entfernt!! nach dem 4. versuch wurde ich ungeduldig – ok, ich bin leicht zu nerven, wenn etwas nicht klappt wie ich mir das vorstelle…
ich bin jetzt dann so weit, dass ich mein leben halt ohne transfers gestalten und mich auf andere dinge konzentrieren werde…


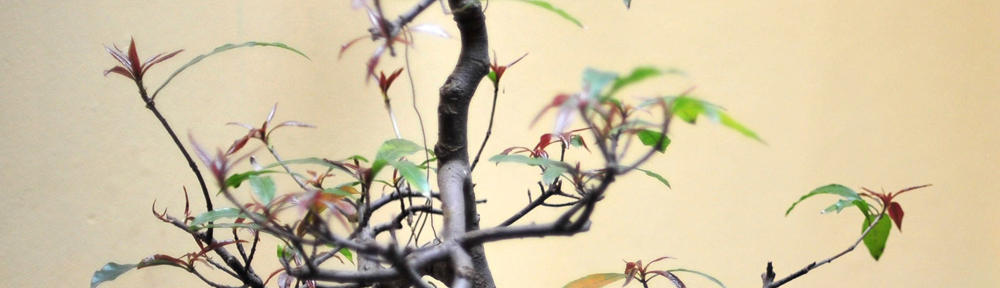
and this one was the best of my results! well, usable, but not what i expected… (the other ones were not to be used anyway…)
und das hier war noch das beste meiner ergebnisse! ok, kann man benutzen (die anderen gar nicht…), aber halt nicht was ich erwartet habe…
i just suppose angela has a different kind of transparencies. the other possibility would be that i´m just toooooooo blonde….
das einzige was ich mir jetzt noch vorstellen kann, dass ich einfach eine andere folie erwischt habe. oder bin ich wirklich zu blond???

rostpapier

this are the results of rusting paper: i think it turned out ok.
——————————
nun endlich mein erstes rostpapier – hier vorder- und rückseite eines blattes (oberes bild mit clipiolas, unteres mit beilagscheiben). utes papiere sind schöner, aber ich werde weiter experimentieren. obwohl ich es jetzt seit ein paar tagen nicht mehr im wasser habe, erscheinen mir die blätter (aquarellpapiere) nicht recht durchgetrocknet. werde sie heute noch mal in die sonne legen. hab sie ein bisschen abgebürstet, da die rostkrümel sonst bei der weiterverarbeitung stören würden.