the second technique i learned last weekend is “bubbling” tyvek. antje and edix (both have no blog) had visited renate, owner of the stempelmine, and there they learned this:
die zweite technik, die ich am samstag gelernt habe, ist das “blasenbügeln” mit tyvek. antje und exid (leider beide ohne blog) hatten renate von der stempelmine besucht und dort folgendes gelernt: (auf deutsch ist die beschreibung übrigens auf renates website, deswegen spar ich mir das hier:)
 you take a sheet of tyvek (sort of “plasticpaper”, some envelopes are made of this, or laboratory overalls; thin and tearproof).
paint both sides with acrylics (same or different colors, as you like) and let dry. i painted mine with black and turquoise (the black color run a bit through to the backside, as i painted it quite wet, but i like the results).
work outside because of the vapors – they might damage your health!
then take 2 sheets of parchment paper (to protect as well the tyvek as your iron).
cut your tyvek into small pieces (i tried out about atc-size, of course you can make any shape and size, but keep in mind it will shrink to smaller than half size!). take a piece and place it between the two baking papers. now move your iron over the tyvek (more floating slightly over the parchment, no pressing!) and you will see it shrink. the bubbles will be on the downside (away from the iron). they will turn out different every time – and that´s the fun part: you will never be able to predict what you will get!
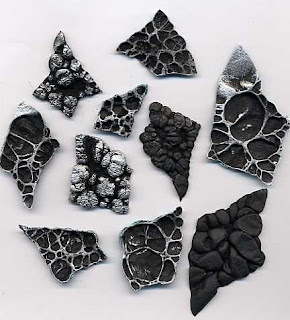
i ironed some pieces with black side down, some the other way.
you can cut them afterwards also, but then i think the organic look is gone. but as you like…
on the upper pic you can see the black sides: if you like you can highlight the bubbles (or the “webbing” structures on the opposite side) with metallic rub ons…
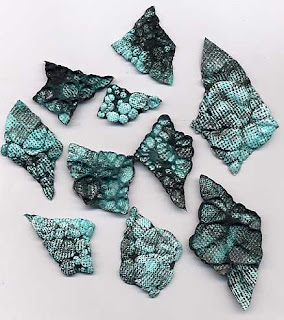
on the pic below you see the turquoise sides – there i did not apply additional rubbings, as i liked the colors this way.
 now you can glue (or sew) on a piece as part of an atc or card. or think of thousand different possibilities…
—————-
not shown here, but you can go on and treat the bubbles with a soldering stick and melt away the middle part of some bubbles to create holes. looks great also, esp. if the edges are highlighted with rub ons.